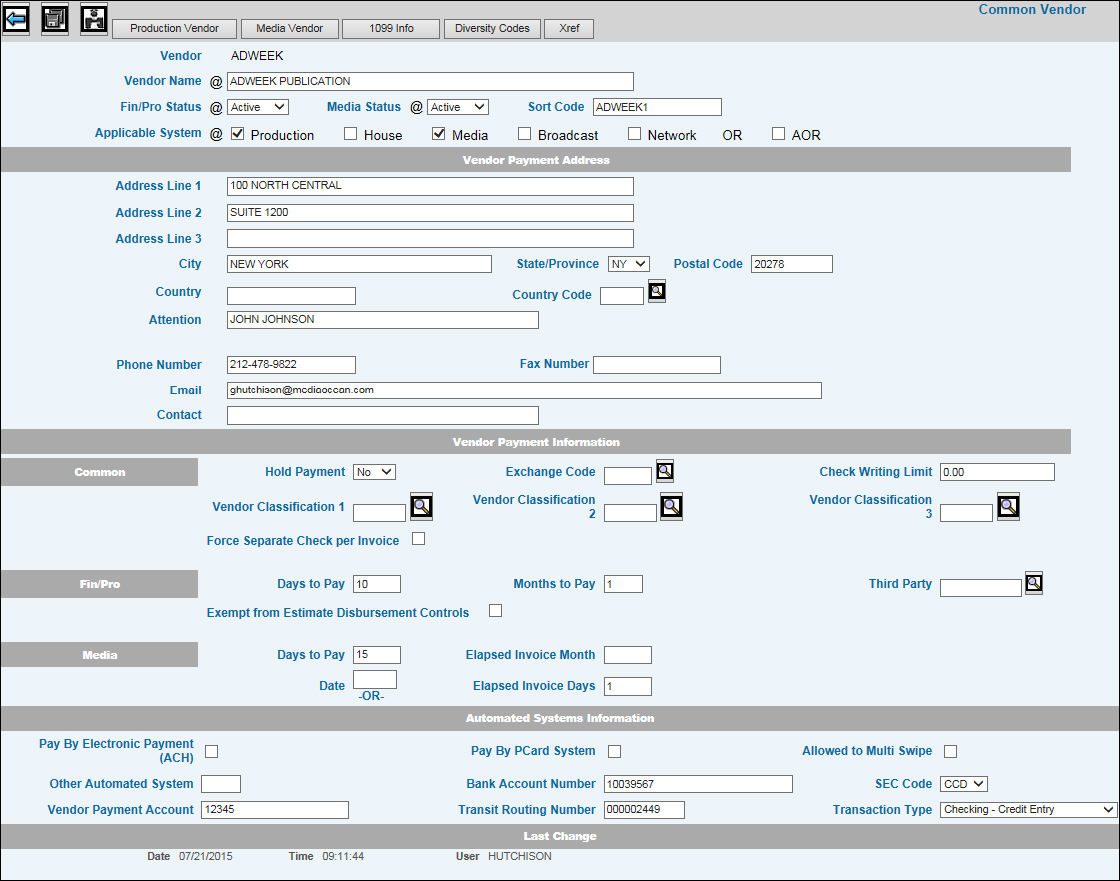
Key the Vendor Name.
For Fin/Pro and House vendors, select the vendor's
status from the Fin/Pro Status drop down list. For Print, select the
status from the Media Status drop down list. No new transactions may
be entered for a vendor with a status of Inactive.
In the Sort field, key the name to be used for this
vendor when sorting vendors alphabetically on listings or reports.
Sorting is only available on reports run in FINANCIALS and PRODUCTION.
If left blank, defaults to the vendor code.
In the Applicable System section, click the check
box for each system for which this vendor code is valid. Click the
AOR box to define the specified vendor as a vendor used by AOR type
agencies, if applicable to your company. AOR type agencies share in
providing services to a client/product and also share in the resulting
revenues.
Key the vendor's main address.
To direct correspondence or payments to a certain
person or location in the vendor's company, key an Attention line.
Key a phone number, Fax number and e-mail address
and contact, if available. Note:
For PCard System banks that require a vendor’s email address, we have
added a control that can make the email address a required field.
If you use PCard banks that require a vendor email address, contact
your Account Manager to have this control activated. When activated,
the following error message displays if an email address is not entered:
“Email is Required With Pay by PCard System”.
In the Hold Payment field, select Yes to prevent any
checks from being written to this vendor. This setting does not affect
other activities relating to this vendor and may be changed back to
No at any time.
If this vendor operates in a currency other than your
own, key a valid exchange code as defined in Exchange
Rates Profile Maintenance.
In the Check Writing Limits field, key the amount
that users cannot go over when writing checks to this vendor. Error
messages will appear on applicable processing windows in Financials/Production
if a user enters more than this amount. Depending on installation,
this field may be input prohibited if you are not a Corporate User.
To link this vendor to a Vendor Classification code
set up in the Vendor Classification
option, key up to three Vendor Classification Codes. When running
reports that have a <Vendor Classification> selection, information
will be collected for only those vendors assigned to these code(s).
To control the way checks are produced for invoices,
click the Force Separate Check Per Invoice box if you want a separate
check issued for each invoice for the vendor. If selected and if there
are three invoices for the vendor in the same check run, then three
separate checks will be issued. This feature helps in dealing with
companies such as credit card issuers who often do not apply payments
correctly if the check and the invoice are not a one-to-one transaction.
To continue the way in which you are currently producing checks,
leave this new checkbox blank.
Indicate how the payment term should be calculated
for this vendor. See Calculating
the Payment Term.
Production vendors only. If you are required to enter
the charges under this vendor but pay a different vendor, key the
vendor number of the vendor which should receive the payments in the
Third Party field. The system will automatically generate one check
for all vendors who have the same third party number.
Production vendors only. Click in the Exempt From
Estimate Disbursement Controls box (to show a checkmark) to allow
all invoices associated with the selected vendor to be paid regardless
of whether the invoice is in compliance with Estimate Disbursement
Control rules. For more information on Estimate Disbursement Control
rules, see your online Help for Production.
To allow/disallow vendor invoices to be paid by electronic
payment, click in the Pay by Electronic Payment (ACH) box to allow
paying by electronic payment; otherwise, leave this box blank. Electronic
payments should only be set up for companies who use Piracle software
(specializing in laser check printing). Refer to the ACH
Electronic Payments Installation Guide for steps on paying vendor
invoices by an electronic payment system (ACH).
For companies who use banks to process vendor payments,
an interface allows vendors to be paid through a credit card file
transfer instead of through receipt of a printed check. The bank sends
emails to vendors informing them to charge a credit card account to
receive their payment. Click the Pay by PCard File box to pay vendors
through a credit card account. Also, depending on bank specifications,
a 16-digit account number may be required and can be keyed in the
Vendor Payment Account field. If you check the “Pay by PCard File”
checkbox, make sure there is no checkmark in the “Pay by Electronic
Payment” checkbox or a code in the Other Automated System field. Continue
to use the Check Writing Limits field to set up the amount that users
cannot go over when paying this vendor. Also, all companies/offices
that will be using the PCard System must be given authority to the
vendor payment account. After completing the Automated Systems Information
section of Common Vendor, click the Company/Office Authority icon.
Click in each box beside the applicable companies/offices, then key
the vendor payment account code for each selected company/office.
When finished, click the Save icon. NOTE:
Companies that want to pay vendors by PCard must be registered for
the PCard system. Contact your Account Manager to register your company
and all banks that will be making PCard payments. Also, if company/office
authority is turned on for your installation, the user who is setting
up PCard vendors must have authority to the applicable companies that
are registered for the PCard system. If not, the following error message
now displays: “User not authorized to any PCard companies”.
For PCard System users whose bank or credit card provider
requires approval to allow the vendor to take multiple payments on
the same card, check the “Allowed to Multi Swipe” checkbox. If
this field is checked, the specified vendor is then allowed to process
multiple payments to the credit card information provided by the bank
or credit card company. This function is only used if the bank or
credit card company requires this type of authorization. Note: The “Allowed to Multi Swipe”
function can only be used when the “Pay By PCard System” checkbox
is checked.
The Bank Account Number, SEC Code, Transit Routing
Number and Transaction Type fields are part of the data base setup
required to pay vendor invoices by the ACH electronic payment system.
If security has not been granted in Vendor Authority, these fields
will not display.
For companies who use BMG Netting to pay vendors,
the Other Automated System field allows you to identify vendors that
are paid through BMG Netting. Vendors must be identified as a Netting
vendor before you can proceed with approvals and production of the
exportable file that is sent to BMG for netting. Key an N in the Other
Automated System field to identify the specified vendor as a BMG Netting
vendor. Also, a 16-digit account number is required and can be keyed
in the Vendor Payment Account field. This account number can be assigned
to more than one vendor. If you key an N in the Other Automated System
field, make sure there is no checkmark in the “Pay by Electronic Payment”
checkbox or the “Pay by PCard System” checkbox. When finished, click
the Save icon.
Refer to Steps 19 and 20 for use
of the Vendor Payment Account field.
To limit access to a vendor
by specific company/office, click the Company/Office Authority icon
 to display all company/offices to
which you have been given authority in Menu Security. Click the check
box beside each Company and Office that should only have access to
the specified vendor. When finished, click the Save icon. When using
applications that require vendor entry, only the companies/offices
you selected will have access to the specified vendor. If all companies/offices
should have access to the vendor, then there is no need to use the
Company/Office Authority function.
to display all company/offices to
which you have been given authority in Menu Security. Click the check
box beside each Company and Office that should only have access to
the specified vendor. When finished, click the Save icon. When using
applications that require vendor entry, only the companies/offices
you selected will have access to the specified vendor. If all companies/offices
should have access to the vendor, then there is no need to use the
Company/Office Authority function.