When you click the Next icon in the Approve/Reject option after selecting timesheets for editing, approval or rejection, the timesheet(s) for the selected employees display.
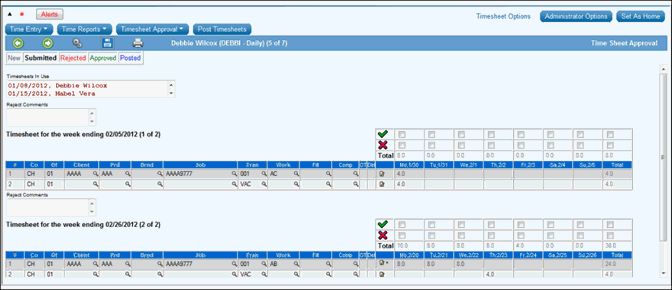
Note: If a lock is placed by the time the approver selects and loads the employee timesheet(s) in the approve/reject detail screen, the locked timesheet will not load and it will be indicated in the "Timesheets in Use" listbox.
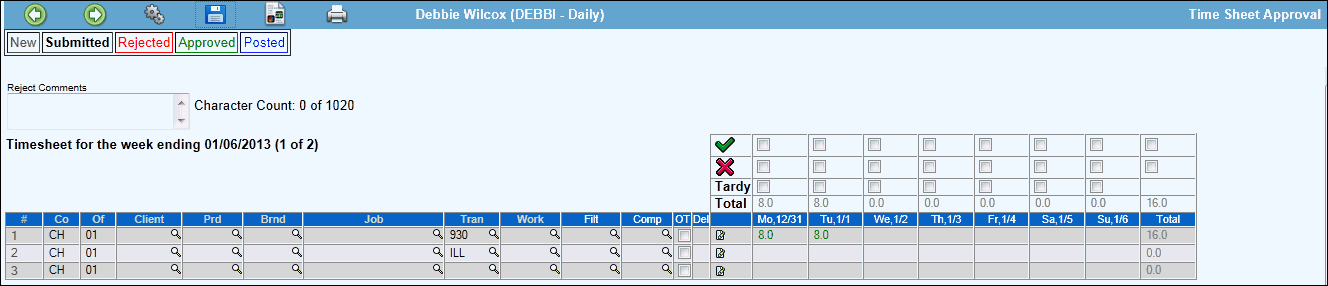
Review Window for Selected Employee
If you selected timesheets for more than one employee, the selected timesheet(s) for the first listed employee displays. If you selected more than one timesheet for an employee, all timesheets and rows can be viewed using the available scroll bars. The timesheet always identifies the employee, the number of selected employee timesheets in (1 of x) format, and the week ending date. The Legend displays in the upper left so you will always know the status of time you are maintaining. After approving/saving time, click the Next icon to display the timesheet(s) for the next employee. Click the Back icon to return to the Prompt.
To perform other functions, review Icon Definitions. To turn auto-menu on/off, review Timesheet Parts.
To make changes, click the cell you want to change and key the new information.
To reject time for the entire week, select the Reject check box above the Total column. For employees who report time daily, reject time by day if you are not rejecting every day in the week. Click the Reject check box above each specific day being rejected.
To enter comments to accompany a rejected timesheet, refer to Rejection Comments.
To approve the entire week, select the Approve check box above the Total column. For employees who report time daily, approve time by day if you are not approving every day in the week. Click the Approve check box above each day you want to approve.
To track employee tardiness, we have added the capability for managers to mark an employee’s time as tardy. Click the Tardy checkbox above the day of the week on which the specified employee was tardy to show a Tardy Comments text box.
Key a full comment (up to 192 characters) pertaining to the reason for marking the employee’s time as tardy then click <Save>. Afterwards, a checkmark appears in the Tardy checkbox. To edit comments, just click the checkbox to open the Tardy Comments text box. Also hover text allows you to place your mouse over the checkbox to display the tardy comments.
To bypass a timesheet, leave the check boxes blank.
Click the Save icon to save your entries, then click the Next icon to display the next selected employee’s timesheets. Repeat steps for each employee's timesheets. When you are finished approving/rejecting/editing/saving timesheets, click the Back icon to return to the selection table.