The automated scheduling feature allows you to set up Start and Due days used to calculate the number of days it takes to complete a task. Start and Due days can be set up in Workflow|Database|Task List Defaults to default into Start and Due fields or they can be entered manually.
The Job Maintenance Detail Window must be completed before you can assign tasks and dates to the job. Refer to Workflow|Maintenance|Job Definition|Job Definition or Production Maintenance|Job Maintenance|Enter Change Delete Jobs.
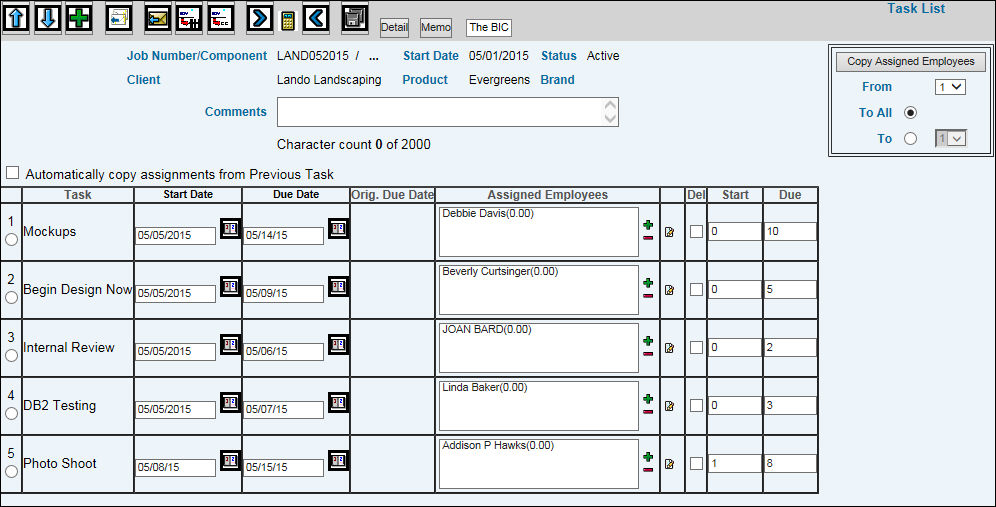
Click <Task List> from the Job Maintenance Detail Window to display all tasks and start and due days based on the Task List Defaults defined in the Database for the specified jobtype.
Task List Based on Task List Defaults
If you set up default Start and Due days, they appear
in the Start and Due fields. Click the Calculate Schedule Forward
icon ![]() to use the Job Start
Date. If you do not want to use the Job Start Date, key a Start Date
then click the Calculate Schedule Forward icon.
to use the Job Start
Date. If you do not want to use the Job Start Date, key a Start Date
then click the Calculate Schedule Forward icon.
The Start Date and Due Dates are automatically filled in with dates based on the number of days entered in the Start and Due fields. Example: If for the first task, the Start field contains a 0 and the Due field contains a 3, then the Start Date will run concurrent with the Job Start Date and the Due Date will be calculated 3 days forward.
Note: Start Dates and Due Dates take into consideration any blocked dates and are not used in the calculation.
You may also calculate backward. To calculate backward,
you must start with the Due Date of the last task and click the Calculate
Schedule Backward icon ![]() . Start Dates and Due Dates
will be calculated in the same manner as described above except that
you will be using the Due Date of the last task to start the calculation.
. Start Dates and Due Dates
will be calculated in the same manner as described above except that
you will be using the Due Date of the last task to start the calculation.
Return to Task List Entry starting with Step 11.
Considerations:
If you change a Start or Due day, you must click the Calculate Schedule Forward/Backward icon to recalculate dates.
Completed tasks will not be used in recalculations. The task following a completed task uses the task Completion Date to recalculate the schedule, not the Due Date.
If a task does not have a Start day and Due day (0 is displayed in both fields), the calculation runs concurrent with the prior task.
If you move a task up or down within the list, you must click the Calculate Schedule Forward/Backward icon to recalculate Start Dates and Due Dates.
When a job with tasks is copied, the new job's task schedule is recalculated using the copy date as the new start date for the first task.