Select Billing | Re-Print Bills.
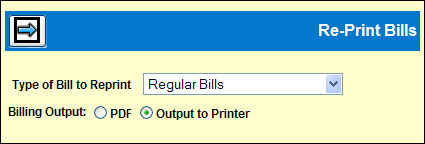
Select the type of bill to be reprinted from the drop
down list, then click the Next icon ![]() to display
the detail window.
to display
the detail window.
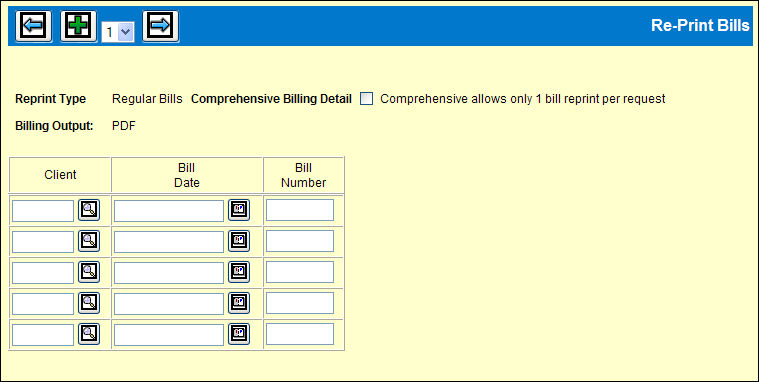
Use the Comprehensive Billing Detail check box to indicate whether to include adjustment detail on the bill. If the box is checked, only one bill may be requested for reprinting.
Checked. Show all adjustment detail that could have been shown on the bill being reprinted, regardless of whether adjustment detail was actually shown on that bill.
Unchecked. Only show activity that was billed on the bill being reprinted, regardless of whether adjustment detail was shown on that bill.
Key the original Client, Bill Date and Bill Number for each bill to be reprinted. (If you are requesting Comprehensive Billing Detail, you may only request one reprint bill.)
For regular or regular reversal bills, use the Add
icon ![]() to add rows for more bills.
to add rows for more bills.
Billing Output defaults to PDF bills. The bills will display to your screen and you may send by e-mail using the Envelope icon.
Click Output to Printer to use traditional billing output queues.
Change the Report Formatting Options, if necessary.
Click <Submit> to submit the reprint request.
Traditional bills are placed on hold. Refer to Work with Spool Files instructions on releasing held reports.