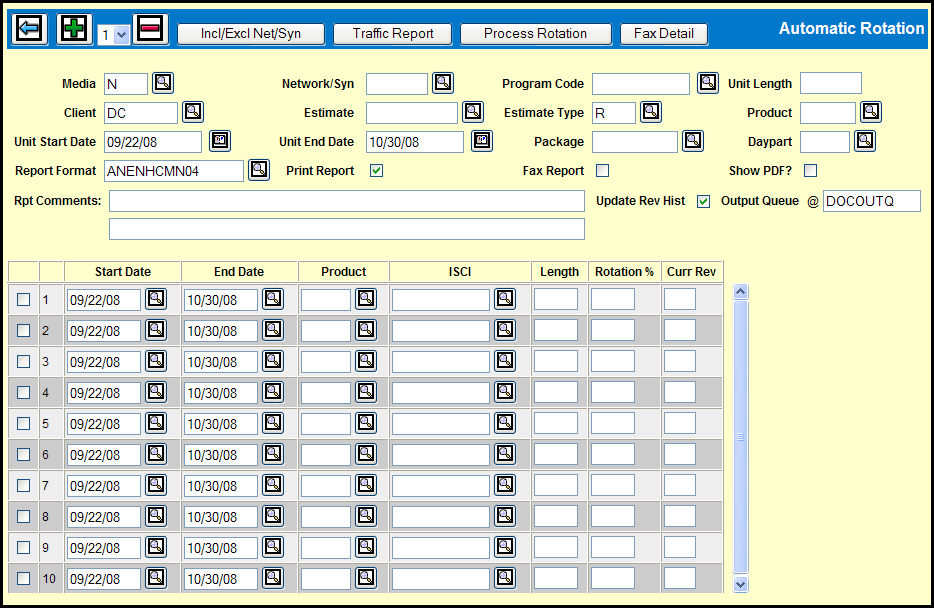
Use the Automatic Rotation option to define a rotation pattern for the automatic rotation of ISCI codes.
The Media, Client, and Unit Start Date fields will be filled in with the data that you entered on the prompt window. However, you may change them if you wish.
The following fields may already be filled in depending on which fields you filled in on the prompt window:
Network/Syn, Program Code, Unit Length, Estimate, Estimate Type, Product, Unit End Date, Package, Daypart, and Report Format. However, you may change them if you wish.
Select the Print Report check box to send the report to the output queue.
Select the Fax Report check box if you want to fax the report.
Select the Show PDF? check box if you want to generate a PDF of the report and display it on the screen.
As you decide which check boxes to select, you need to keep in mind that there are several ways that the Print Report, Fax Report and the Show PDF? check boxes interact with each other.
Use the Rpt Comments text boxes to add any additional comments you specify
Select the Update Rev Hist check box is you want to update the history for this ISCI assignment request. You must select this check box if you want to track revision numbers.
If you are printing the report, you can change the default Output Queue, if you wish.
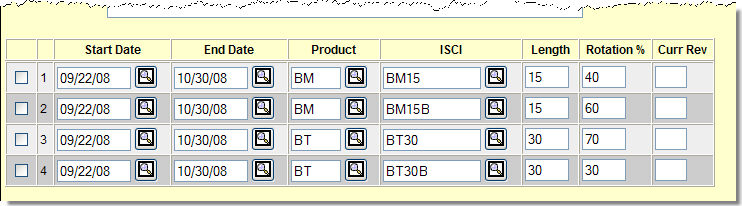
By default, the table consist of 10 rows and depending on the data that you entered on the prompt window, the following fields in the table may already be filled in:
End Date, Product, and Length. However, you may change any of the fields if you wish.
Key or Lookup the ISCI codes.
Fill in the Rotation % fields. As you do, keep in mind that the rotation percentage for each product must not exceed 100%.
The process considers all 10 rows in the table regardless of whether you enter data in them or not. Therefore, you will want to select the check boxes adjacent to any unused rows and click the Remove icon to delete them.
Click the Process Rotation button to display the Coordinator window.
Fax Detail button: If you have selected the Fax Report check box and want to confirm or change the fax information, you can click the Fax Detail button.
Incl/Excl Net/Syn button: If you want to include or exclude specific Network / Syndicators, you can click the Incl/Excl Net/Syn button.
Traffic Report button: If you want to proceed directly to the a Traffic Report option, fill in the Report Format field and click the Traffic Report button.