The Miscellaneous Adjustments function is used to make adjustments without having to consider amount limitations. These adjustments only include outstanding A/R invoices due to currency conversion differences and withholding taxes that are in excess of the maximum limit defined in the Agency Profile. Adjustments of this type only apply to these two accounts only. You may not make any other kind of adjustments that exceed the maximum limit. Before adjustments can be made, a Currency Exchange Account and Tax Withholding Account default must be set up in the Maintain A/R Account Defaults option.
Note: Depending on how your company was installed, Miscellaneous Adjustments may not be available for use.
Repeat Steps 1 and 2 of Entering Cash Receipts.
From the Action drop-down list, select Miscellaneous Adjustments
Key or select the Payer code based on the selected Payer Type.
Key a Reference number for this entry.
Key the Amount of the adjustment.
Key or select the deposit date in the Date field.
Accept the default Bank Code (based on the signon Company/Office) or key the applicable bank code.
Click the Next icon to display the Filter Invoices Window.
Key information in any of the fields to limit the collection of invoices.
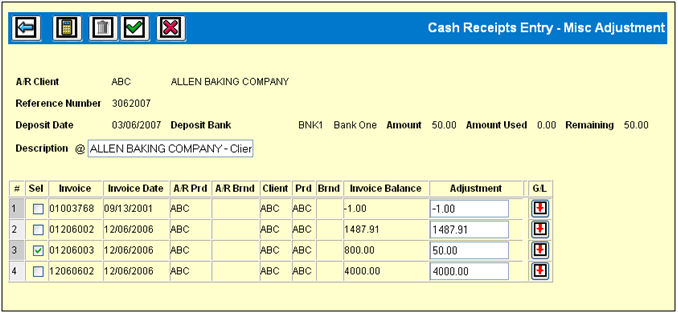
Click the Next icon to display all open invoices based on the A/R client specified and fitting the specified selection criteria display on this screen.
Miscellaneous Adjustment Selection Window
Select the invoice you want to adjust then key the amount of the adjustment in the Adjustment field.
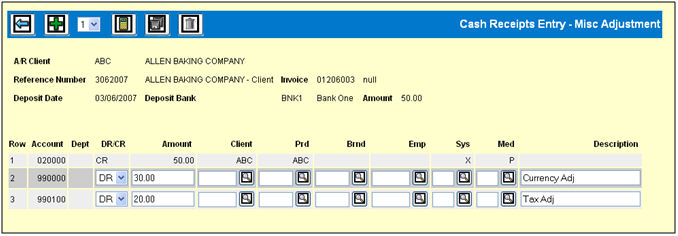
Click the G/L down arrow to display the G/L Distribution Window.
The Credit amount and the A/R Account Defaults display.
Key the Debit/Credit amount of the adjustment for each account in the Amount fields.
Leave the Client, Product, Brand, Employee, System, Media fields blank unless the data base has been set up to require this information.
Key a description for the adjustment in the Description fields. This description will display in the General Ledger for identification.
Click the Save icon to save your entries.
Verify information using the List to Verify option.
Post transactions using the Post Cash Receipts option