Basic Steps to Match an Invoice
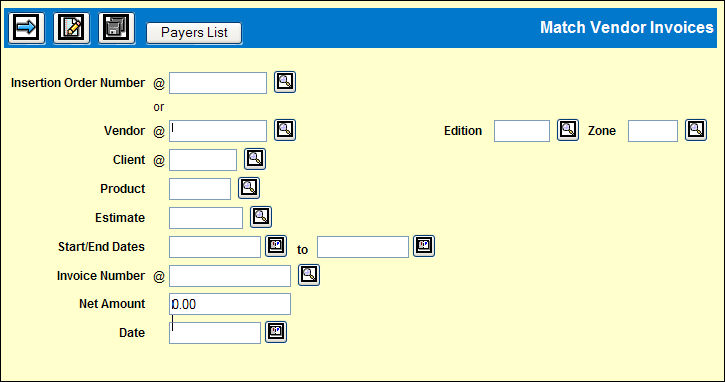
Select Clearances|Match Vendor Invoices.
Key the required fields marked with the @ symbol on the Prompt window. For a new invoice, also key the Start/End Dates, Invoice Number, and (Invoice) Date. Other fields are optional.
When retrieving existing invoices for an adjustment, key only the required fields, using the lookup for the Invoice Number, if needed.
Click the Next icon.
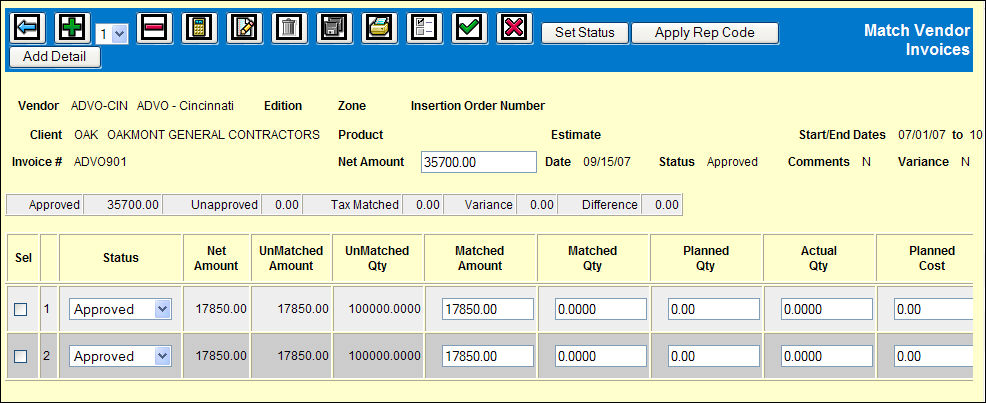
Detailed Matching Window (See also Match Vend Inv Fields and the Matching Types chart.)
Match Vendor Invoice Detail Window
Assign a Rep to Buyline
To assign a Rep code to one or many of these buylines:
Click the Sel checkbox for each buyline that should be assigned a rep.
Click <Apply Rep Code> button to display a popup window where you key or lookup the Rep Code to apply.
Click the Save icon to add the Rep code to all selected buylines.
If all buylines are grayed out:
An asterisk * displays in the Status field. The Hold Payment field for the vendor is Yes in Common Vendor.
If the buyline was not billed and the Client or Profile setting is set to Payment Restriction: Billed Items Only, then the buyline will be grayed and an * will be in the Status column on that row. Once the buyline is billed, it can be matched to an invoice.
If some buylines are grayed out:
P If a single buyline is grayed out and there is a P in the Status column on that row, the buyline was matched, cleared and paid.
S The invoice was matched and cleared, and selected for payment in Financials System.
Matching on the Detail Window
To fully match buy units to the invoice you defined on the Prompt window, click to select Approved from the Status dropdown. Do not fill in the other fields. To partially match a buyline, see the next set of steps.
You may also choose Varied (for final matching a variance for write off), unapproved, and the blank.
To view the payment address/payee, hold the cursor over the gray area in the Override Address to: column for that item. The payment address is initially retrieved from Common Vendor: the applicable Alternate Address for Use P (Payment) is retrieved, if defined; otherwise the vendor's main address is retrieved.
To override the retrieved payment address to the vendor's main payment address, select Y from the Override Address to: Main drop down list.
-Or-
To override the payment address to a rep address defined in Rep Definition, key the rep code in the Override Address to: Rep text box.
The CD (cash discount) indicator column displays after the Actual Cost column. If the cash discount differs between the invoice and buy, select Y or N from the drop down list in the second CD column to indicate whether the cash discount applies to this insertion and to print the insertion on the Invoice Matching Report.
Click Save icon.
To Match All Invoices Quickly
To match all invoices quickly, click the green check Select All icon then click <Set Status> button.
Choose the status for all selected invoices.
Click Save icon.
Partial Matching for a Buyline
To partially match a buyline, fill in the Matched Amount field and any other field that applies.
If you import interactive buylines from a 3rd party vendor, many of the other fields may be filled in by the import. Edit as needed.
If
you vary costs/amounts in the fields, click Recalculate icon ![]() on the icon bar at the top of the window to have the
buyline record display correctly.
on the icon bar at the top of the window to have the
buyline record display correctly.
Click the Save icon.
Matching Deleted Buylines
If deleted buylines appear on an invoice, each has a Net Amount of 0. However, you still need to match the credit for an offset or use a Credit Memo. Use a minus (-) before the amount to indicate it was deleted.
Adding a Comment for the Invoice header.
Click the Comment icon on the icon bar above the columns fields.
Specify whether the comment should be directed to R the Remittance or E Estimator's Discrepancy Report.
Click Save icon.
Next Step: Clearing Matched Invoices
Once the buylines on a vendor invoice are all matched, partially matched, unapproved, or had a variance process in this option, request Clear Matched Invoices to clear these items.