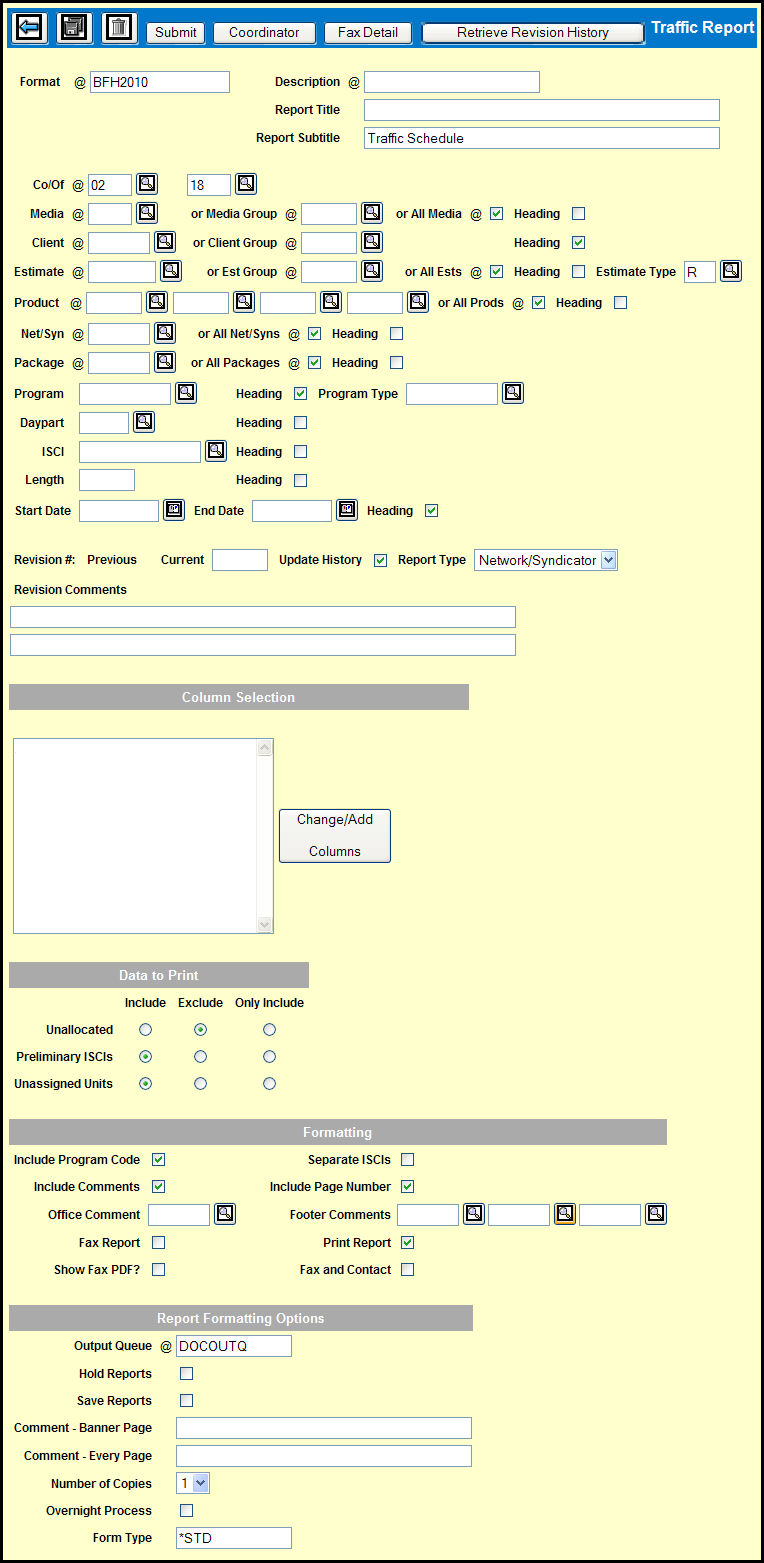
The Traffic Report detail window provides you with considerable flexibility when it comes to designing your report format. You can select the units to be included, choose the columns, and specify how the information is to be sorted. You can then save report format for later use.
Keep in mind that most of the fields on the Traffic Report detail window are optional and many of the required fields have default settings.
As you're filling in many of the fields in the main section of the window, you'll find Heading check boxes at the end of the rows. Selecting the Heading check box will indicate that you want to include that code in the header of the Traffic Report. In addition, selecting the Heading check box will specify that the report should break on pages where the that code changes.
Key in a Description for the report format.
If you want, you can key in a Report Title and a Report Subtitle.
The Company and Office fields will be filled in by default, but you can change them if you need to.
Key or Lookup a Media or Media Group code or select the All Media check box.
Key or Lookup a Client or client group.
Key or Lookup an Estimate or Estimate Group code or select the All Estimates check box.
Key or Lookup 1 to 4 Product codes or select the All Products check box.
Key or Lookup a Net/Syn code or select the All Net/Syns check box.
Key or Lookup a Package code or select the All Packages check box.
If you want to limit the report to one program, key or Lookup a Program code.
If you would rather limit the report to a program type, leave the Program field blank and key or Lookup a Program Type code.
If you want to limit the report to a specific daypart, key or Lookup a Daypart code.
If you want to limit the report to a single ISCI, key or Lookup an ISCI code.
If you want to limit the report to commercials of a single length, key a value in the Length field.
If you want to limit the report to units for a certain date range, key or use the Broadcast Calendar Lookup to select a Start Date and an End Date.
The first time you process/print/fax this report, the Update History check box is selected by default and will automatically set the Revision # to 0.
When you change an assigned ISCI on a unit and request a Traffic Report to send the revision to the vendor, you will need to take these additional details into consideration.
By default, the Report Type drop down displays Network/Syndicator, which is the only report that may be faxed. However, you can select any of the available report types.
If you are revising a Traffic report, you can key in Revision Comments to provide an explanation.
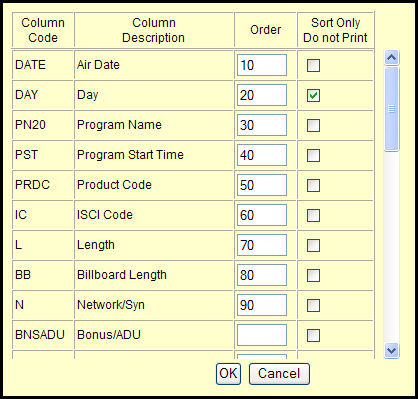
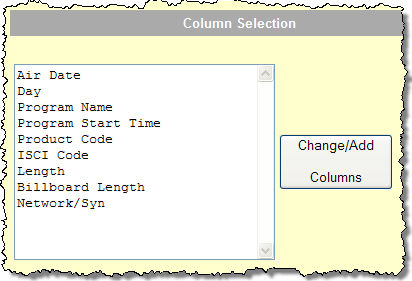
In the Column Selection section, you can select the columns that you want to print on the Traffic Report.
In the Data to Print section, you can select what data you want on the report.
In the Formatting section, you can specify how you want the report to be formatted and processed.
Choose your preferred Report Formatting Options.
Click the Save icon to save your report format.
Click the Submit button to print or fax the Traffic Report.
Fax Detail button: If you have selected the Fax Report check box and want to confirm or change the fax information, you can click the Fax Detail button.
Coordinator button: If you want to specify/confirm contact information, you can click the Coordinator button.
Retrieve Revision History: button: If this is a revision to previously-trafficked units, click the Retrieve Revision History button to retrieve that previous information for the report before submitting this report.