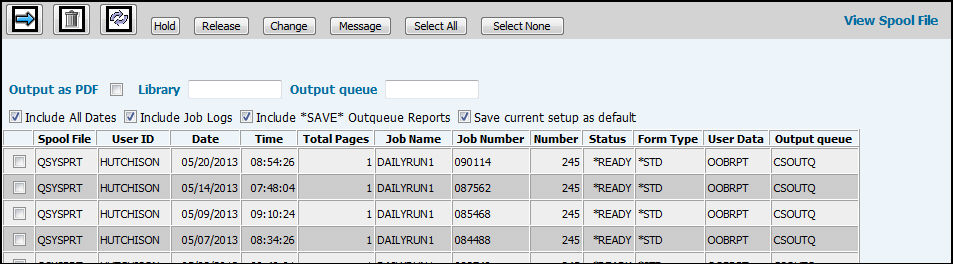
The View Spool File window displays a list of all the spool files or reports that you have generated. You can display the contents of a selected file on your screen, as well as output these files as a PDF which can then be e-mailed with additional text to multiple users. The displayed report can be printed or output to a text file so it can be imported into a spreadsheet or word processing program.
Keep in mind that the View Spool File window will not list reports requested using the Reports tab in the Buy Module. However, it does include all other Broadcast reports, even those that are not on the browser menu.
To view a list of files in an another Output queue,
key a specific Output queue and click the Refresh icon ![]() .
.
You can sort the list of Spool Files that display by clicking the Spool File column heading. When the sort completes, a solid triangle displays next to the column heading indicating the direction of the sort.
You can control the reports that display in your spooled files and output queue. The first time you log on to this option, your default view is a list of the current day’s reports only.
To view reports for all dates, select the Include All Dates check box.
To display job log reports, select the Include Job Logs check box.
To display a list of reports that were sent to an output queue that have the word “Save” in them, select the Include “SAVE” Output Queue check box.
To view reports in all authorized output queues associated with a specified Library, just key the Library code in the Library field. Also, if keying a specific output queue and that output queue is associated with more than one Library, then reports in the output queue associated with each Library will display
To save the selections you have chosen, select the Save Current Setup as Default check box. If you decide you do not want to display a certain type of report, just clear the applicable check box.
You can select the check box adjacent to any file to work with the file:
To view the contents of a selected file on screen,
click the Next icon ![]() . You can then print
the report or export the file as a text file so it can be imported
into another application. See Viewing
Reports in the Browser Window.
. You can then print
the report or export the file as a text file so it can be imported
into another application. See Viewing
Reports in the Browser Window.
To create a PDF of a selected file, select the Output as PDF check box and click the Next icon. You may then attach the PDF to an e-mail. See Creating PDFs of Reports.
To delete the selected file, click the Delete
icon ![]() .
.
To prevent the selected file from printing, click <Hold>.
To release a file with a status of Held, click <Release>.
To change the Number of copies to print, Restart printing, Outqueue, or Save settings, click <Change>. See Change Settings.
To respond to a file with a status of Message, click <Message>
To select all files, click <Select All>.
To clear all selected files, click <Select None>.