If you do not request sales register reports with write offs, then writeoffs will not appear on the report. If you INCLUDE writeoffs, then if written off to an expense account, the amount will show up in the cost column; if written off to a revenue account, then the amount will be in the revenue column, and the value will be reversed. Example: Writing off $100 to an expense account will be a positive $100 in the cost column. Writing off $100 to a revenue account will be a negative $100 in the revenue column. In the case of write offs, there is no Gross or Billing total since no billing occurred.
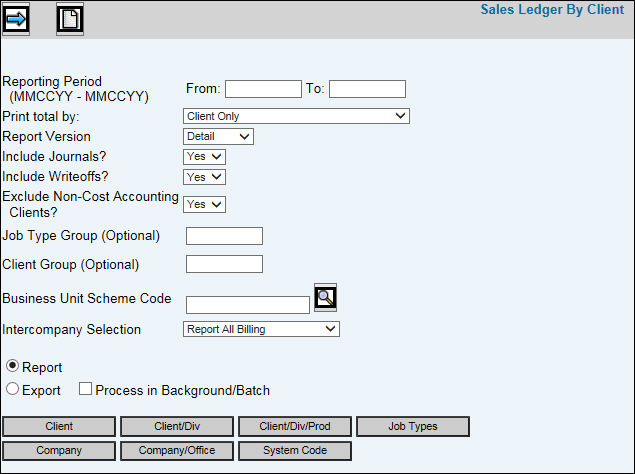
Select Sales Ledger|Sales Ledger by Client.
Key the Reporting Period From/To date in MMCCYY format.
From the Print Total By drop-down list, select one of the following:
Client. Information is displayed for all Clients.
Level 2. Information is displayed for all Clients and Divisions if the client is set up by Division.
Level 3. Information is displayed for all Clients, Divisions, and Products if the client is set up by Division and Products.
Business Unit All Clients – Full Code. Information is displayed for all clients and if a Business Unit Scheme is keyed, clients and client/divisions with the same Group ID code in the scheme are added together and reported as one client under the Business Unit name. Consolidated information is identified on the report by the “Full” Group ID code and “Full” Group Name description.
Business Unit Clients Only – Full Code. Information for only clients and client/divisions with the same Group ID code in the scheme is added together and reported as one client. Clients that are not associated with a Group ID are excluded from the report. Consolidated information is identified on the report by the “Full” Group ID code and “Full” Group Name description. A Business Unit Scheme Code must be keyed to identify the groups for which client information is consolidated.
Business Unit All Clients – Short Code. Information is displayed for all clients and if a Business Unit Scheme is keyed, clients and client/divisions with the same Group ID code in the scheme are added together and reported as one client. Consolidated information is identified on the report by the “Short” Group ID (first three characters of the Group ID code) and the Optional “Short” Name Description.
Business Unit Clients Only – Short Code. Information for only clients and client/divisions with the same Group ID code in the scheme is added together and reported as one client. Clients that are not associated with a Group ID are excluded from the report. Consolidated information is identified on the report by the “Short” Group ID (first three characters of the Group ID code) and the Optional “Short” Name Description. A Business Unit Scheme Code must be keyed to identify the groups for which client information is consolidated.
Select the Report Version
Detail: Shows all invoices billed during the accounting period range selected
Summary:Displays basic total lines without showing individual invoice detail.
Accept the default of Yes to include journal entries that affect revenue; otherwise, select No from the Include Journals drop-down list.
Accept the default of Yes to include write-offs; otherwise, select No from the Include Writeoffs drop-down list. Write-offs are included in the COST column only.
Accept the default of Yes to exclude clients not associated with Cost Accounting; otherwise, select No from the Exclude Non Cost Accounting Clients from the drop-down list.
Key a Client Group, Job Type Group, or Business Unit to collect information pertaining only to those groups.
To further limit information that displays, click any of the applicable buttons and select items from the list.
Click the Next icon ![]() to display the Printing Selections Window. Refer to Printing
Selections Screen.
to display the Printing Selections Window. Refer to Printing
Selections Screen.