This window displays when you complete the Purchase Order Entry Window
as described in Job Purchase Orders
or Blanket Purchase Orders and
click the Next icon ![]() .
.
If using the Vendor Currency Cost function, purchase orders will continue to be reported on all reports as local currency. The VENDOR currency will carry to the last screen where you enter information for the vendor to see.
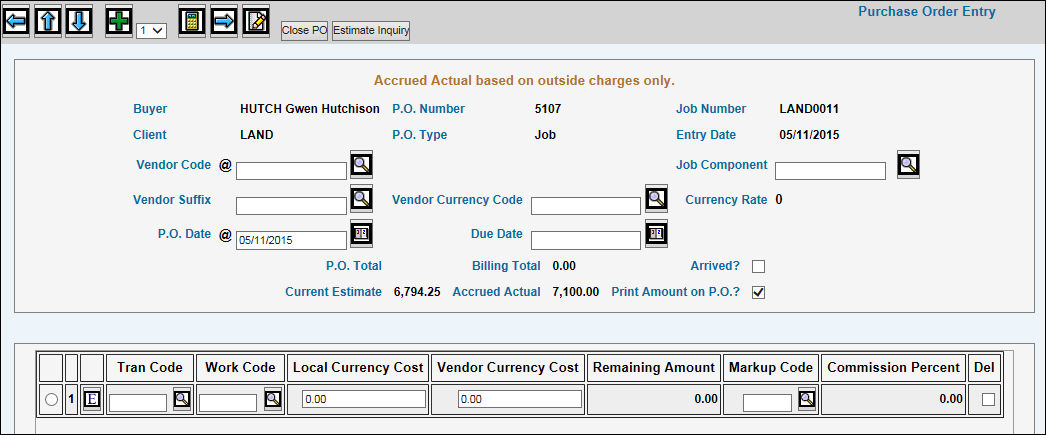
Key information required to set up the purchase order. Click the <Fields> button at the bottom of this help page for field-level help.
To add entry lines, click the Counter icon ![]() . From the
drop-down list, select the number of entry lines you want to add.
Click the Add icon
. From the
drop-down list, select the number of entry lines you want to add.
Click the Add icon ![]() to add
the number of selected rows.
to add
the number of selected rows.
To delete a line, place a check in the Delete box. When you click the Save icon on the P.O. Free Format Window, the line is deleted.
To set up additional descriptions that display only
on invoices/billing, click the Additional Description icon ![]() .
.
To inquire into the estimate for this job, click <Estimate Inquiry>. See Estimate Inquiry.
Click the Estimated Work icon ![]() beside the line item to display Transaction Codes, Work Codes, and
Descriptions that you can use for this estimate. Select the applicable
codes and click <Done>.
beside the line item to display Transaction Codes, Work Codes, and
Descriptions that you can use for this estimate. Select the applicable
codes and click <Done>.
If this is an existing purchase order, you will see a Free Format Options box. Click the Add radio button if you want to add the detail line(s) listed on the Purchase Order Entry Window to the P.O. Free Format Window. Information that is added includes the Description and Amount. If you want to Delete all free format lines from the P.O.Free Format Window, click the "Rewrite" button. If you do not want to change the P.O. Free Format, accept the default of "No Change."
Click the Next icon to advance to the P.O. Free Format Window. See P.O. Free Format
To close the purchase order but retain the history for reporting purposes, click <Close PO>.
![]()