The Traffic Instructions Detail window appears when you click the Next icon in the Traffic Instructions Add/Maintenance window.
You'll use the controls in this window to select from the ISCIs you defined during the ISCI Definition procedure and assign them to the traffic instruction.
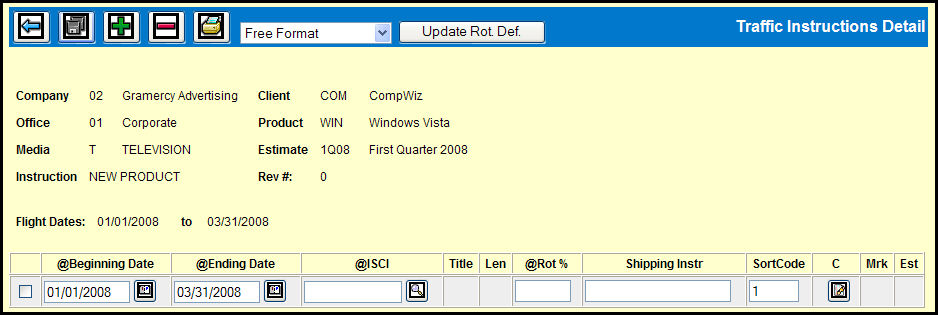
Traffic Instructions Detail Window
Use the Add icon to add a row for each ISCI being assigned to this traffic instruction.
The Beginning Date and Ending Date fields will be filled in using the dates provided earlier for the Flight Dates, but you can change them if you need to.
To fill in the ISCI field, click the Lookup icon, select an ISCI from the list that appears in the ISCI window, and click Done button.
In the Rot% field, type a whole number for the rotation percentage for that ISCI.
You can type a brief message in the Shipping Instr field.
If you add multiple rows to the Traffic Instructions Detail window, you can enter numbers in the Sort Code field in order to create a custom sort order.
You can click the Comments icon in the C column to add any additional comments. If comments have already been entered, you will see + symbol next the icon.
At this point you can do one of two things:
You can click the Print icon to print the traffic instructions with the selected ISCIs.
You can click the Save icon to save these ISCI assignments and return to the Traffic Instructions Add/Maintenance window. You may then print the traffic instructions from that window.
Rotation Percents drop down: The numbers that you enter in the Rot% field must be whole numbers, but there are four options that you can use to get the total you want.
Update Rot. Def. button: If you alter the number in the Rot% field and want to replicate this change back to the ISCI Rotation Definition, just select the check box for the row and click the Update Rot. Def. button.