Select Admin|Jobtype.
Key a Job Type, then click the Next icon ![]() .
.
Select Admin|Jobtype.
Key a Job Type, then click the Next icon ![]() .
.
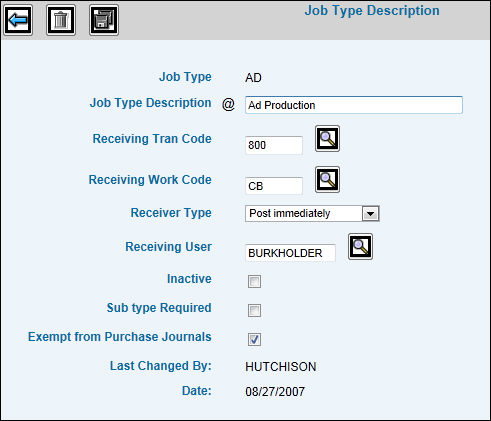
Jobtype Description Detail Window
Key the Job Type Description then click in the Subtypes box to indicate that subtypes are required.
The next four fields (Receiving Tran Code, Receiving Work Code, Receiver Type, Receiving User) are used with Studio Billing and are required to properly transfer charges to the studio-target job for rebilling to the client. Keying information in these fields sets up the jobtype used by the client-owning office as well as defines the way in which charges are transferred.
Key the Receiving Tran Code and the Receiving Work Code to which studio-billed charges are posted.
From the Receiver Type drop-down list, select Post Immediately to automatically post charges to the applicable master files and make journal entries. Select Receive as EDI Invoice to receive the Studio Billing only to the point where it is available in APPOST where processing is completed. In this case, no permanent posting is performed until the receiving user reviews and accepts the charges in APPOST and selects the posting option. This gives the receiving company a chance to review the charges to make any corrections or to delete an item if not desired.
Key the Receiving User in the company receiving charges who will receive and process EDI invoices and who is noted on the audit trail report that is produced from billing.
To inactivate an existing jobtype, click in the Inactive box to show a checkmark.
Click in the Exempt from Purchase Journals box (to show a checkmark) to stop Purchase Journals for any jobs assigned to this job type; even if a workcode on the job has been defined to make a Purchase Journal.
Last Changed By and Date fields display the name of the user who performed the last change to the job type and the date on which the change was made.
Click the Save icon ![]() .
.