Select General Ledger|Inquiries|G/L Information View/Export.
Key the reporting period (MM/CCYY) in the From/To fields.
From the Data Summary Selection section, click the applicable radio button to select the report. If you select a summary report such as By Co/Office/Account/Dept, all records with the same Co/Office/Account/Dept will be added together and shown as one line. Selections include:
Full Detail No Summary
By Co/Office/Account/Dept
By Co/Office/Account/Corridor
By Co/Office/Account/Dept/Corridor
By Co/Office/Account
Export is selected by default.
To continue to work in another option or even log off while the information is being processed, click in the "Process in Background/Batch checkbox. This feature works with the Export function so make sure you click both the Export radio button as well as the "Process in Background/Batch" checkbox to process requested information in the background.
To limit information that is collected, click any of the selection boxes and make selections from the list.
Click the Next icon to display the Columns to Include on Listing window. Columns to include will differ based on your selection made in the Data Summary Selection section. Example: More columns are available when selecting "Full Detail No Summary" than when selecting "By Co/Office/Account". Select only the information you wish to include on the report then click the Next icon again to display the Processing Window.
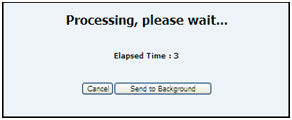
You may click <Cancel> to cancel your request or if the report is large, you can take advantage of the <Send to Background> function which processes the request in the background so you can continue to work in other options. This function is also available on the Prompt as described above.
As always, if you process in the background and your report is under 2MB in size, you will receive your report as an attachment in an email after processing is completed. If your report is over 2MB in size, your email will contain a link that will open a download window where you can save the file to a spreadsheet format.
If you do not click <Cancel> or <Process in Background>, your report is output to the browser where you will see Filter, Page Number, and Max Rows functions. Click the Next Page (down) arrow to display the next page of information on the report. Click the Previous (up) arrow to return to the previous page of information. Key a Max Row to limit the amount of rows that display on a page to the specified number. To filter information, key a valid filter in any of the blank fields located below the applicable column heading and press <Enter>. Only values that match the specified filters are displayed. When filters are applied, page numbers are no longer displayed; however, you can continue to use the Next Page feature to advance to the next page of filtered information on the report. To remove all filters, click <Clear Filters> or you may remove filters separately by highlighting a filter and clicking <Delete>. Note: Total rows are not recalculated when filtering.
Click <Export to Spreadsheet> to export your report to a spreadsheet format or click the Print icon to generate a PDF of your report. If filters are used, only the information that is filtered displays on the spreadsheet or PDF.
Note: PDF processing limits the number of rows that display on the PDF to 3,000. If you receive the message “3000 row limit reached”, use the new filter function to limit the amount of information that is collected.