Select General Ledger|Inquiries|G/L Account Analysis.
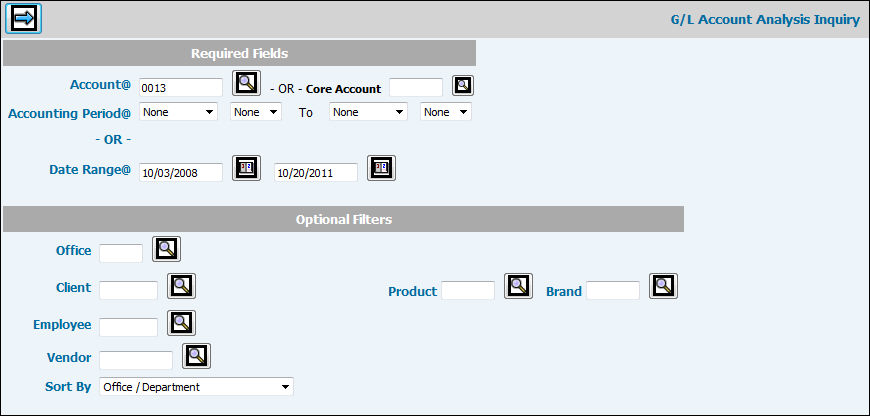
Key or select the Account you want to analyze.
Key an Accounting Period (MMCCYY) in the From/To Date Range fields to collect G/L Account information for the accounting periods falling between the specified date range. If you do not want to collect infomation by an Accounting Period Date Range, select NONE in the To fields.
Or
Key a Date Range (MM/DD/CCYY) in the From/To fields to collect G/L Account information for the time falling between the specified date range.
To collect account information for a specified office, client/division/product, employee, or vendor, key or select codes in any of the fields in the Optional Filters area. The balance forward calculation represents the balance in the account for a specified vendor, employee, or client if information is keyed in any of these optional filter fields. If you want the balance forward to represent the whole account, leave these optional filters fields blank.
From the Sort By drop-down list, select Office/Department to print the report in Office order by Department, select Department/Office to print the report in Department Order by Office, or select Document Date/Ledger Document to print the report in Document Date order by Ledger Document.
Click in the box next to each column description you want to include on the report. Items you select will display as a column of information.
Click the Next icon to display the report. If an office is not specified, the balance forward for the account for all offices is calculated and displays in the Balance Forward field. If an office is specified, then the balance forward for the Office/Account is calculated and displays in the Balance Forward field. If you key an optional Office filter on the Prompt, the office name appears in the Office area on the Header. The Range area will reflect either the Accounting Period or Data Range that was keyed on the Prompt. To export the report to a spreadsheet, click <Export to Spreadsheet>. To print the report, click the Print icon on the Detail window and select your paper size from the popup. Your inquiry will be displayed in a PDF format. From the PDF, you can then print your inquiry.