General Ledger Ad Hoc Inquiries PDF Layout Tab
The PDF Layout sub-tab contains options that allow you to customize the appearance of your PDF. You can include headers of your choice that will appear at the top of your PDF report as well as format the alignment and font size of these headers.
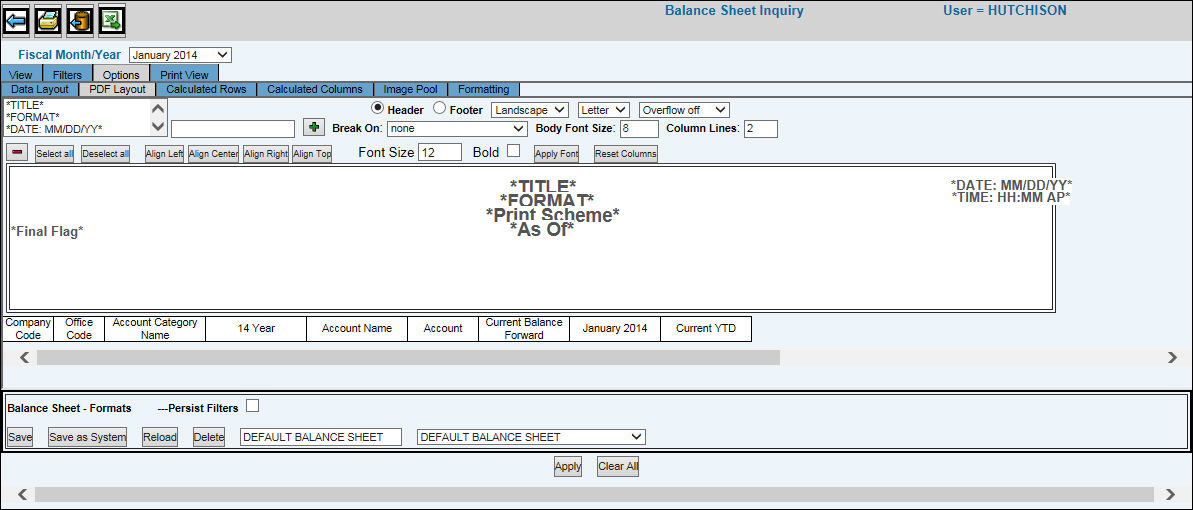
To format headers:
Click the Header radio button to display a list of Headers. Headers may be the name of the report, a title, a date, a graphic (see Image Pool sub tab), etc. Select header items from the displayed list or key a personalized header item in the text box located beside the item list, then click the Add Text (Plus Sign) button. Multiple header items can be selected by holding down the CTRL key. All selected or keyed header items are placed in the view pane where they can be manipulated. Also, when selecting ”Format” from the list of headers, you must remember to also select the format title you want to use from the drop-down list of reports located in the lower portion of the window. Tip: The header item is selected when you see vertical bars on either side of the header text.
To apply page numbers to your PDF, select one of the following formats from the list of header items: PageOf (produces Page 1 of 10), PageNbr (produces just a number. e.g., 1) or Page PageNbr (produces Page 1).
Important: Selected or keyed header items are placed in the upper left corner of the view pane after you click the Add Text button. These header items must be placed elsewhere on the view pane before you can add another header.
If you have selected multiple header items, click <Deselect All> to work with each item separately or leave all items selected if you are working with a group of items that will be aligned together. To format a header item, it must be selected. To align header items, click one of the four alignment types (Align Left, Align Center, Align Right, Align Top). If you have selected multiple header items, the first time you click an alignment type, all header items will be lined up underneath one another according to your selection. A second click of the same alignment selection will place all aligned items on the specified area of the view pane. Use your horizontal scroll bar to scroll across the view pane to see your alignment choices. To delete a header item, select it then click the Remove Text button.
To change the font size and/or font style, key the font size in the Font field, click in the Bold box to apply a bold style if applicable then click <Apply Font>.
If column headings contain several words, you may want to stack headings to reduce column width that in turn, reduces horizontal scrolling. To stack column heading, key the number of lines in which you want to stack headings in the Column Lines field.
You also have the option to create page breaks on specific data items by selecting the item from the Break On drop-down list. Example: If you selected Account Type, pages will break each time a different Account Type is found. As a result, similar data items can be grouped together.
To change the size of column widths, just click in any of the displayed columns located directly above the horizontal scroll bar and drag to the desired width. To change the width back to the default width, click <Reset Columns>.
To format footers:
Click the Footer radio button to display a list of Footers.
The process for formatting Footers is identical to the process for formatting Headers; therefore, refer to the formatting header steps above for the formatting process.
To change orientation and paper size:
To change the orientation of your report to accommodate report width, select either Landscape or Portrait from the displayed drop-down list.
To change the size of paper to accommodate report length, select either Letter (8.5X11) or Legal (8.5X14) from the displayed drop-down list.
Balance Sheet Format Section
Refer to the Balance Sheet Format Section described for the Data Layout tab for information on functions and fields.
Click the Print View tab to display your customized PDF. Note: You must always remember to click <Apply> to save your layout before going to the Print View tab. This action ensures you seeing the correct layout.
Click the Export to Excel icon to export your report to a spreadsheet format.