Important: You must remember to establish data base settings in the Maintain A/R Statement Format before you can work with A/R Client Statements.
Select Accounts Receivable|Reports|A/R Client Statement.
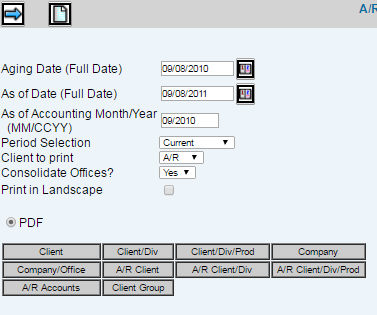
Accept the default system Aging Date (Full Date) or key the date by which you want the report aged.
Accept the default As of Date (Full Date) or key a date to request client statements on as ”as of” date basis.
Accept the default or key a month/year to collect transactions based on an Accounting Month/Year. This field works in conjunction with the As of Date field by including A/R transactions posted through the requested accounting period up to the specified As of Date. Example: If you key 02/2011 in the Accounting Month/Year field and key 03/15/2011 in the As of Date field, A/R transactions are collected for the month of February up to March 15, 2011.
From the Period Selection drop-down list, select From History or Current. Select Current (if you want the receivables to be aged by days) or History (if you want a statement of items billed through a certain past date). These selections work in conjunction with the date fields. If you selected Current and if you want the receivables to be aged by days, key the full date to be reported as current. The system will show receivables that are 30, 60, and more than 60 days old. If you selected History and if you want a statement of items billed through a certain past date, key that full date to be reported. This results in the system ignoring any billing performed after that date.
From the Client to Print drop-down list, select to include the billing client/product on client statements or A/R client/level2/level 3.
From the Consolidate Offices drop-down list, select whether to print a consolidated statement that includes all offices when reporting grand totals.
Click in the Print Landscape box to print statements in a wider format and shows debit and credit columns.
The PDF feature allows you to print the statement in a PDF format.
To limit information that is collected, click any of the selection buttons and make selections from the displayed lists.
Click the Next icon to generate the statements.