To accept a contract, select Accept Contract from the EDI Menu. If you want your agency to also generate program codes during these steps, refer to Generating Programs from Accepted Contracts and also contact MediaBank Client Service.
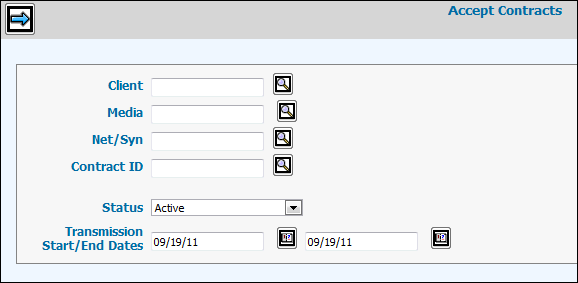
No entries are required on the Prompt window, however, you may key codes to limit the Contracts Listing on the next window.
Click the Status dropdown to select other than the default Active status. The other choices are: Accepted; Active and Accepted; and Excluded from Acceptance. Each gives you different choices to view on the Contract Listing window.
You may delete the default current Start/End dates or key your own date range.
Click Next icon to display a list of contracts that were transmitted.
On the Contract Select window, observe whether there were translation errors that require your intervention on this window.
Click the checkbox to select the contract you want to work with, then click Next icon.
On the Detail Window, for each the Program listed, key or select from lookup, the Program name, Air Date, Estimate, and Package fields to create buys in network. If the package specifies an estimated data stream, the new buys retrieve this information. Keying the Product field is optional.
Use EDI Program Name field enables you to choose to use the EDI program name instead of the AV name on reports. Click to check.
Product attached to the package will be added to any EDI Contract and/or units sent without a product assigned. Any existing product sent by the vendor on an EDI contract remains on the unit.
All required codes must be completed on the Detail window in order to have the contract accepted. No partial contracts are accepted.
Note: You may not delete any row nor may you delete this contract from the Trading Partner, as it is a legal document.
Note 2: You may accept a revision for a contract even when the original for the same contract was already accepted. Caution: You will have duplicate inventory unless you remove the original units.
If you want Network to accept the EDI Program code, click the checkbox for Use EDI Program Name.
To bypass contract demo validations, click the “Ignore Demo Validation” checkbox. Ignoring demo validation means that if a contract demo is not on the Product/Estimate demo list, you will not receive the error message stating that “Contract demos do not match Product/Estimate demos” and you will not have to add/remove any demos to allow the upload. Demos only on the Product/Estimate will be uploaded to Network and buys created when the contract is accepted. If a contract demo is not on the Product/Estimate demo list, then these estimate statistics will not be captured in the buy.
Contract Detail Time Saving Hint:
To add new codes quickly, click to select units to receive the same codes. Fill in the codes in the Change Values section, then click <Change>.
Next, click to select other units that should receive different Program, Estimate, Package, and Product codes that you will key in the Change Values section. Click <Change> to apply the codes.
You could have also clicked the Select All icon to fill the checkboxes, in order to make the same change to all the units on this contract.
To
Unselect All, click the ![]() Deselect icon.
Deselect icon.
Click <Accept> to accept the contract, and display the Accept Units window.
If a Demo did not exist in the translation files and was not translated in the translation options, the Translate Deal Demos window pops up with input fields for each demo in this contract that needs translation. Up to 18 demos can be accepted for each program.
Key the AdVault® Network Demo code to be used for the vendor EDI Demo.
Note 3: If the demos are not translated, then AdVault® Network cannot accept the contract.
Click <Continue with Accept>.
On the next window, click to check whether the Estimated Audience Statistics provided by the trading partner should be copied to the units that are created.
Click to check whether the Program Start/End Times provided by the trading partner should be copied to the units that are created. If you type N, the system uses the start/end times from the appropriate program profile in Network.
Click <Accept> to confirm. The contract data is uploaded to Network, and buys are created.
Launch the Buy Module to perform any additional tasks related to these new units.
See also EDI Contract Reports.