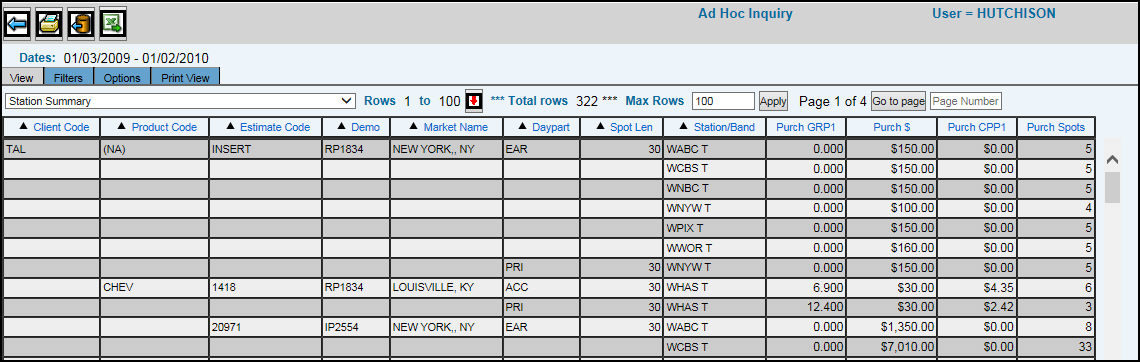
The View Tab in Ad Hoc Inquiry displays the selected data in a table format.
You can click on any of the column headers in the table to sort the data.
As you analyze the data you can use the view drop down menu at the top of the table to switch between any of the available views.
The Total Rows value indicates the number of rows in the table.
If there are a large number of rows in the table you can use the scroll bar to view all the rows in the table. However, you can use the Max Rows setting to set the maximum number of rows that can be displayed in the table. When you click the Apply button, the table is divided up among multiple pages and page up and down buttons appear at the top of the table. The “Go to Page” function allows users to go directly to a specified page within the displayed page range instead of having to use the page down/up functions. To go to a page, key the applicable page number in the Page Number field and then click <Go to Page>.
Note: If your request exceeds the 500,000 limit, an error message displays. The maximum amount of rows that can display is dependent upon the available memory on a user’s computer.
Use the Back icon to return to the initial Radio Ranker window.
Use the Print icon to access the Print View tab when you can print the data.
Exporting to Excel and CSV.
The Export to Excel icon enables you to export your view and you may accept the following condition: Include Total Line - Click in this checkbox to include the grand total line on the report; otherwise, leave this checkbox blank.
The Export to CSV icon enables you to export your view and accept the following conditions: Include Request Parameters. Click in this checkbox to display request parameters (type of report, date, time, company/office, etc.) used when collecting information for the report; otherwise, leave this checkbox blank. Include Total Line. Click in this checkbox to include the grand total line on the report; otherwise, leave this checkbox blank. Exclude $. Click in this checkbox to exclude the dollar sign ($) from amounts; otherwise, leave this checkbox blank.
When the File Download dialog box appears, click the <Save> button. When the Save As dialog box appears, use the standard controls to specify where you want to save the file. Accept the default file name or rename the file.Click the <Save> button.