The timesheet report lets you view and print timesheet information by date range for yourself and any users over whom you have manager authority.
Note: When you close a job through final billing, AdClock © is checked for any unposted Approved or Submitted time for the job. However, since time with a status of Saved or Rejected is not considered in this process, you should run this report for the Saved and Rejected statuses before final billing/closing a job. You may then contact employees to submit or correct any applicable timesheets before you close the job.
To display a timesheet report:
Select Timesheet Options|Timesheet Reports|Time Report.
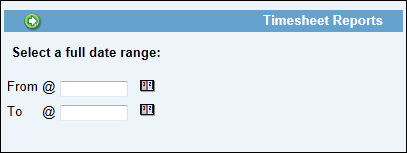
Key the From and To dates for the report or select them from a calendar using the Calendar icon.
Click the Next icon.
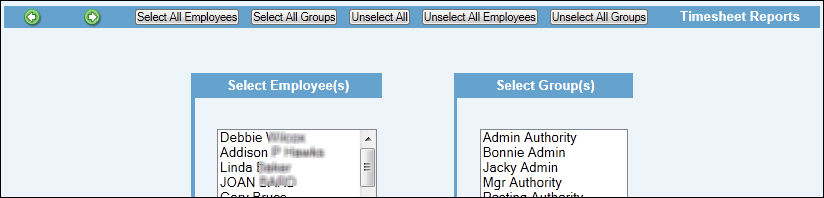
Timesheet Report Selection Window
The Select Employee(s) box lists yourself and all employees over whom you have Surrogate or Manager authority. The Select Group(s) box lists all groups over whom you have Surrogate or Manager authority. Select one or more employees and/or groups to include on the report or click <Select All Employees> to select all the displayed employees and/or click <Select all Groups> to select all the displayed groups. To change your selections, you may use the <Unselect All Employees> button to clear all individual employee selections without affecting the group selections or use the <Unselect All Groups> button to clear all group selections without affecting the individual employee selections.
Click the Next icon to display the Report Selections window.
Accept the default to view the Status Report, or choose Activity Report. The Activity Report is the same as the Status Report, except that it includes all statuses and omits status codes and comments. It also summarizes daily hours when more than one row has the same codes. To generate a report showing only overtime information, choose the Overtime Only Report. Once you click this button, all other selections become unavailable for use. However, you can still use the filters located at the bottom of the window. Once you click the Next icon, the Overtime Only Report shows the name of the employee who submitted overtime, the date overtime was worked, the number of overtime hours, any comments, week ending date, and totals
If you choose the Status Report, check the box for each status you want included on the report, or click <Select All> for all statuses.
To display Job and Tran code descriptions on the report, click Display Descriptions.
For time that has been approved, click the Display Approved By and/or Display Approved Date check boxes to display on the report the name of the manager who approved the time and/or the date the time was approved.
To display the date the timesheet was submitted/approved as well as the employee who submitted/approved the timesheet, just click in the “Display Approved Date”, “Display Approved By”, “Display Submitted Date”, and/or “Display Submitted By” check boxes to display this information on the report.
To display the name of users who enter time on timesheets, click the Display Entered By checkbox. This allows you to identify users who may enter time for other users. Afterwards, the name of the user who entered time, the date on which time was entered, and the employee code of the user display in the Entered Info section of the report.
Choose how to sort or limit the report: Accept the default sort of By Employee Name, or choose to sort the report By Employee Department, By Account Manager, or By Project Manager. If you select one of the manager sort options, you may limit the report to a specific account or project manager by keying the manager's user ID in the field to the right.
To limit the report to a specific Tran Code, key the code. To select multiple Tran Codes, click the Search icon next to Tran Code field. When the Search dialog box displays, click the check box to the left of each code to be included on the report, then click <Submit multi-selection>.
To limit the report, key a specific code in one or more of the remaining fields.
Click the Next icon to display the report.
To print this listing, click the Print icon. Click the Export function to export displayed information to a spreadsheet. Note: The Export function is only available on the Timesheet Status Report. It is not available on the Activity Report or the Overtime Only Report.